In this post we will use Clion IDE on Windows and document few errors which i encountered while building with android NDK.
1: Windows /CLion IDE with cmake
Here is the build environment we chose to use :
- Host Platform : Windows
- cmake – Bundled cmake installed with Clion. (cmake 3.15)
- GNU make program – mingw32-make (Download : https://managedway.dl.sourceforge.net/project/mingw-w64/Toolchains%20targetting%20Win32/Personal%20Builds/mingw-builds/installer/mingw-w64-install.exe)
- Clion2019
Download sample project : https://github.com/mamtadevi/CrossPlatformBuild/tree/master/UtilityClion
Import project to your Clion IDE. Before building project, let us check out some cmake settings. On the left bottom corner, you will see cmake tab, hit on settings. tool chain will detect all the installed tools, along with bundled cmake and you can see the version numbers too.
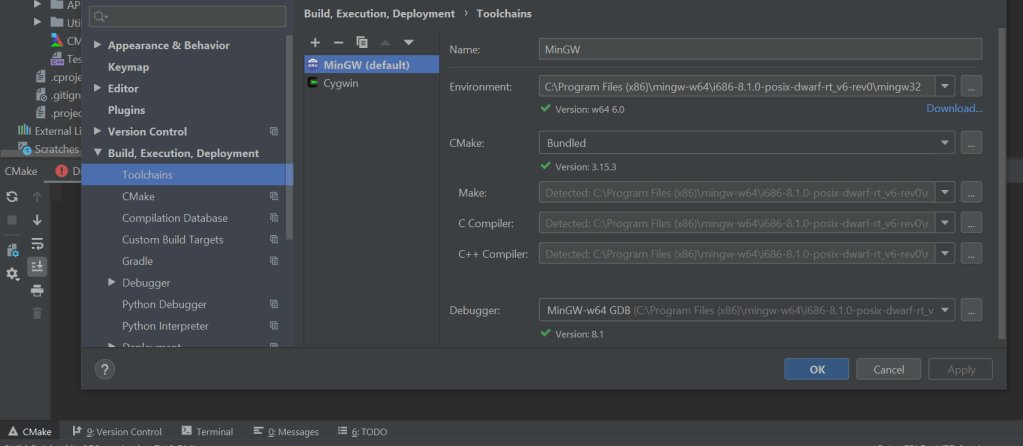
In cmake tab by default it will detect the default toolchain. You can create different toolchains for mingw, cygwin and and select them in cmake. Also in cmake options you can choose to create with different make file generators as shown in Part1 .

Go back to project, click on cmake settings , hit “Reset Cache and Reload Project”, check the following output, by default cmake choose “CodeBlocks -MinGW Makefiles generator”.

Make files are generated in build folder. Its the time to execute generated MakeFile. Go to terminal. You can see TestLibExecutable.exe generated as you execute makeFile.
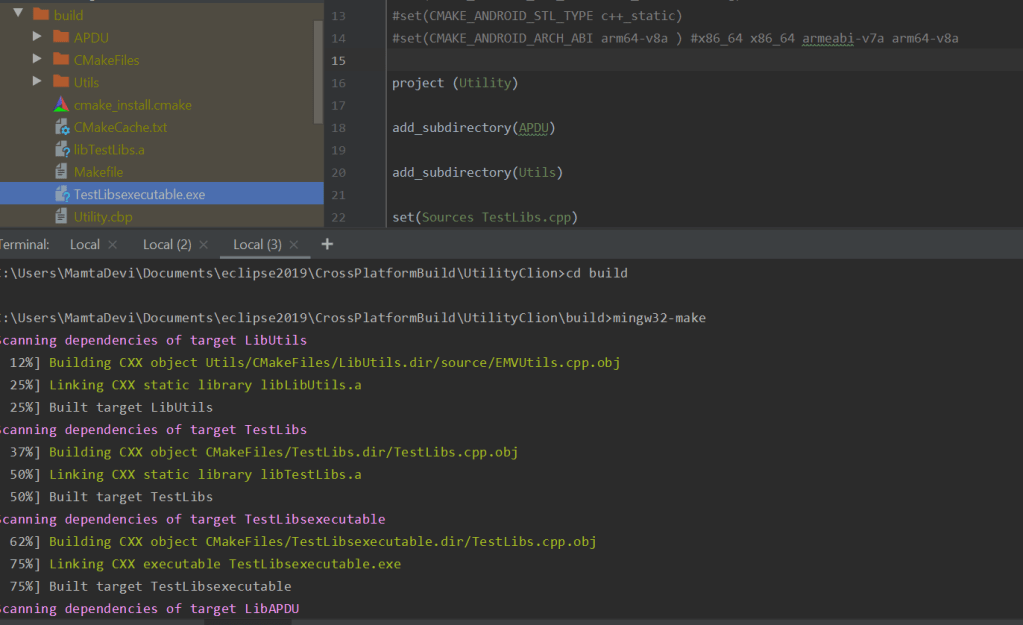
Simply execute the .exe, if it is build correctly, you should see execution message.

2: Windows /CLion IDE with cmake/Andriod NDK
Next is to build a cross platform target using Android NDK. For this we will need Andriod NDK in addition to the tool chain we already have. Download android-ndk-r19c-windows-x86_64. Uncomment the following section in CMakeLists.txt and we are ready to build. The target ABI chosen is : arm64-v8a. You can choose to build for any one the four targets mentioned in file.
#message(“################################################################”)
message(” Building for Android “)
#message(“################################################################”)
set(CMAKE_CLANG_CXX_LIBRARY -std=libc++ )
set(CMAKE_SYSTEM_NAME Android)
set(CMAKE_SYSTEM_VERSION 26)
set(CMAKE_ANDROID_NDK “C:/android-ndk-r19c-windows-x86_64/android-ndk-r19c”)
set(CMAKE_ANDROID_NDK_TOOLCHAIN_VERSION clang)
set(CMAKE_ANDROID_STL_TYPE c++_static)
set(CMAKE_ANDROID_ARCH_ABI arm64-v8a ) #x86_64 x86_64 armeabi-v7a arm64-v8a
Go back to cmake settings, hit “Reset Cache and Reload Project” , you will see following output. This time you will see clang as identified compiler, but you will see following error:
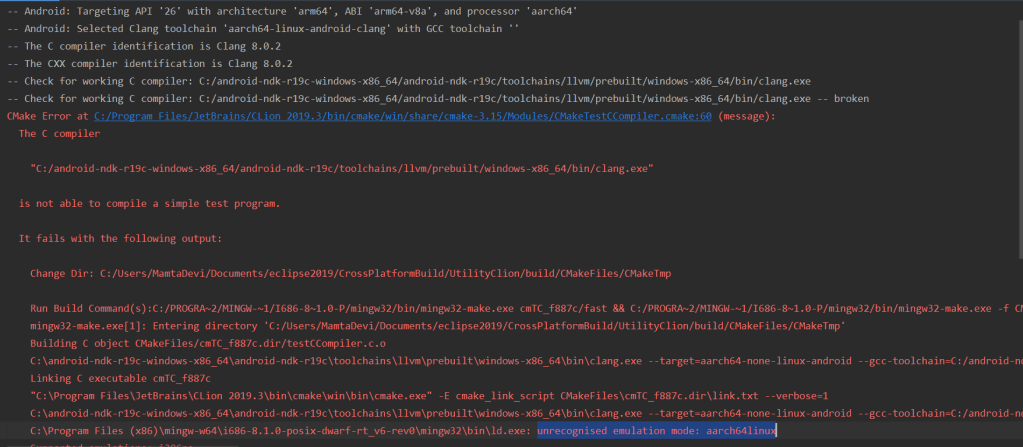
The reason of compilation error is a linking error : unrecognised emulation mode: aarch64linux. If you notice on the top Clang selects GCC tool chain for to generate build file and tries to find required emulation mode aarch64linux, since mingw does not have this target emulation mode, so we need some changes.
with cmake 3.15 somehow clang always selects Android tool chain with GCC tool chain and what we need to make it work is Clang with Unified toolchain to get correct target emulation mode.
On cmake 3.16 , it selects Clang with unified tool chain. Go back to settings and in tool chain, simply replace bundled cmake with cmake 3.16.
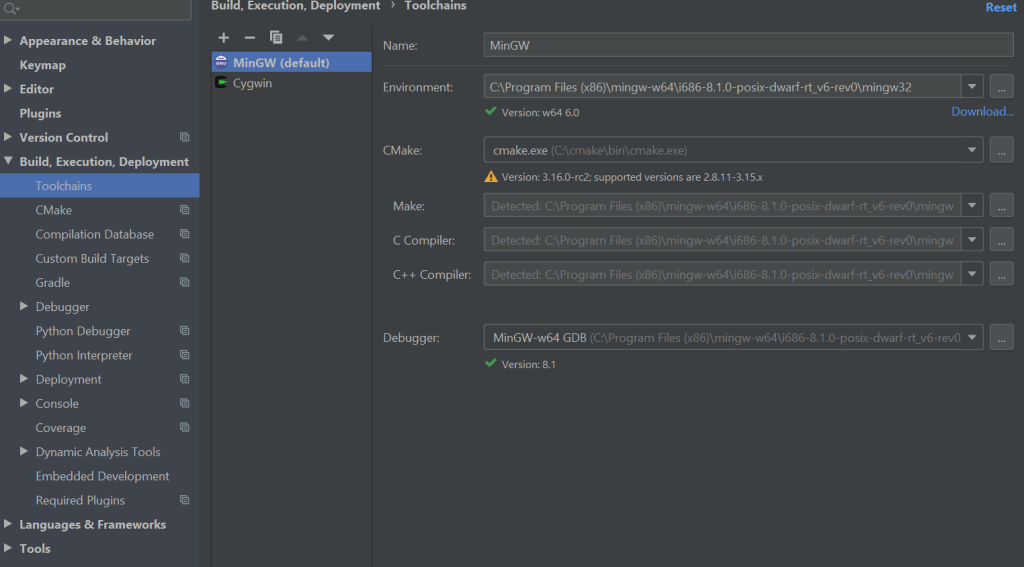
Apply changes and build again, this time clang with unified tool chain is selected and build files should be generated as follows:

Go to terminal and build MakeFile:
C:\Users\MamtaDevi\Documents\eclipse2019\CrossPlatformBuild\UtilityClion>cd build C:\Users\MamtaDevi\Documents\eclipse2019\CrossPlatformBuild\UtilityClion\build>mingw32-make
You will notice following error:
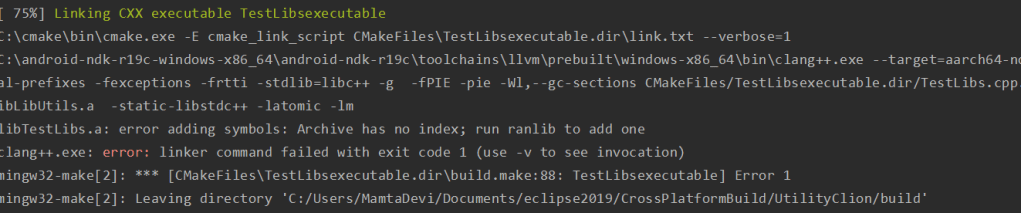
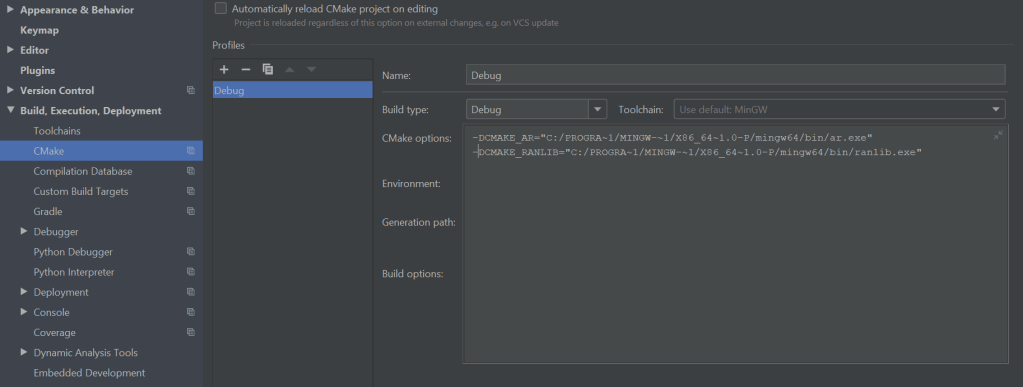
Reason of error is cmake has failed to find two important executables: ranlib.exe & ar.exe, so we need to mention them explictly in cmake arguments.
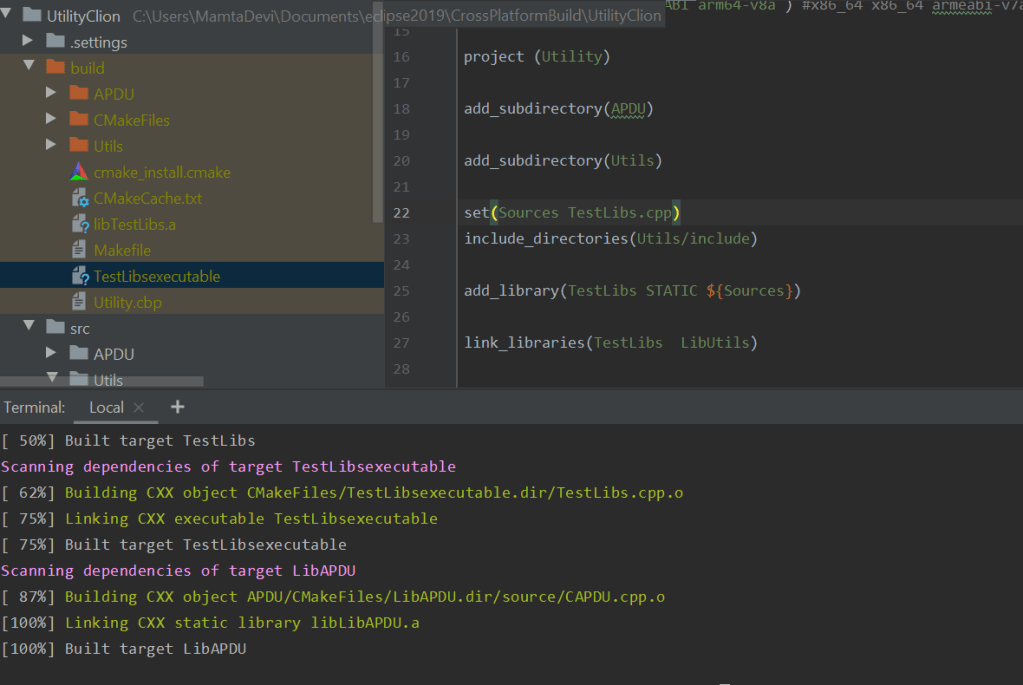
Apply and follow the build procedure again. This time after executing MakeFile, you should see the generated executable.
To summarize this article, it was a small attempt to make Clion work with cmake to generate build files for host and cross platform android targets. Part III will summarize usage of Clion on Linux machine and cmake with two more tools (doxygen for documentation & GoogleTest for unit testing).
